How to Use Ankify to Turn Files Into Anki Flashcards Fast (Complete 2026 Guide)
Posted on: 2026-01-11

Creating Anki flashcards manually is effective — but painfully slow. Copying text from PDFs, fixing formatting, and deciding what’s worth memorizing can take hours before you even start studying.
Ankify changes that.
Ankify is a web-based tool that uses AI to turn files like PDFs, slides, and documents into ready-to-study Anki flashcards in minutes. Instead of spending time formatting cards, you can focus on learning and review.
This guide walks you through how to use Ankify step by step, explains best practices for creating high-quality decks, and shows how to export your flashcards to Anki correctly.
What Is Ankify and How Does It Work?
Ankify is an AI-powered tool that automatically converts study materials into Anki flashcards.
Instead of manually creating cards, Ankify:
- Extracts key concepts from your files
- Generates structured flashcards
- Lets you control card types, quantity, and style
- Exports a clean Anki deck you can study immediately
Supported formats include PDFs, Word documents, lecture slides, Google Docs text, and plain text notes. This makes Ankify especially useful for students and professionals who rely on spaced repetition.
Why Manual File-to-Anki Conversion Is a Problem
Traditional PDF-to-Anki workflows often create unnecessary friction:
- Important ideas get buried in long paragraphs
- Copy-paste breaks formatting
- Flashcards become vague or overly broad
- You spend more time formatting than learning
Ankify focuses on what matters most: clear questions, atomic facts, and recall-based flashcards that work well with Anki’s spaced repetition system.
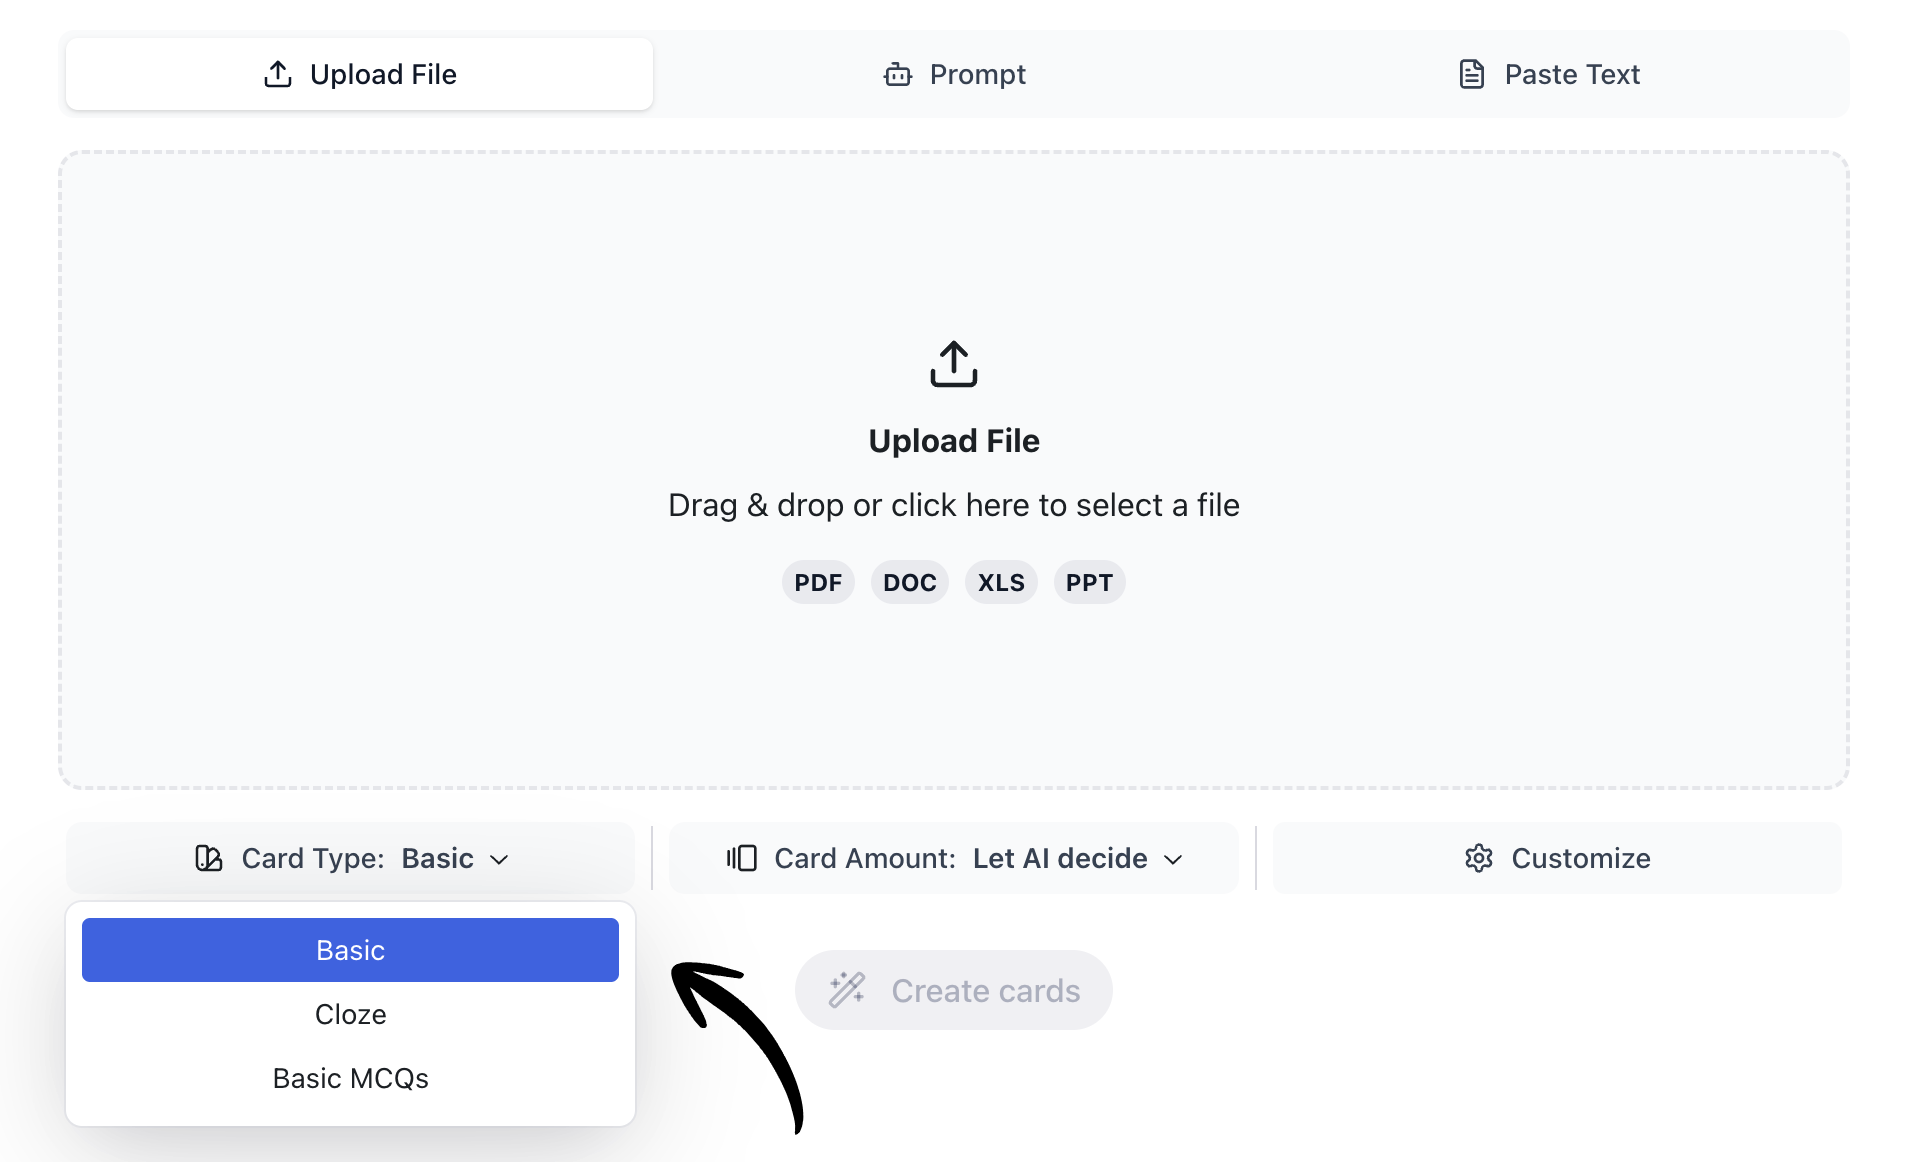
Step 1: Upload Your File to Ankify
Using Ankify is straightforward:
- Go to ankify.app
- Upload your PDF or paste your text
- Let Ankify analyze the content
There’s no setup and no manual cleanup. Ankify automatically identifies key concepts and prepares them for flashcard generation.
Step 2: Choose the Right Anki Card Type
The card type you choose has a direct impact on retention.
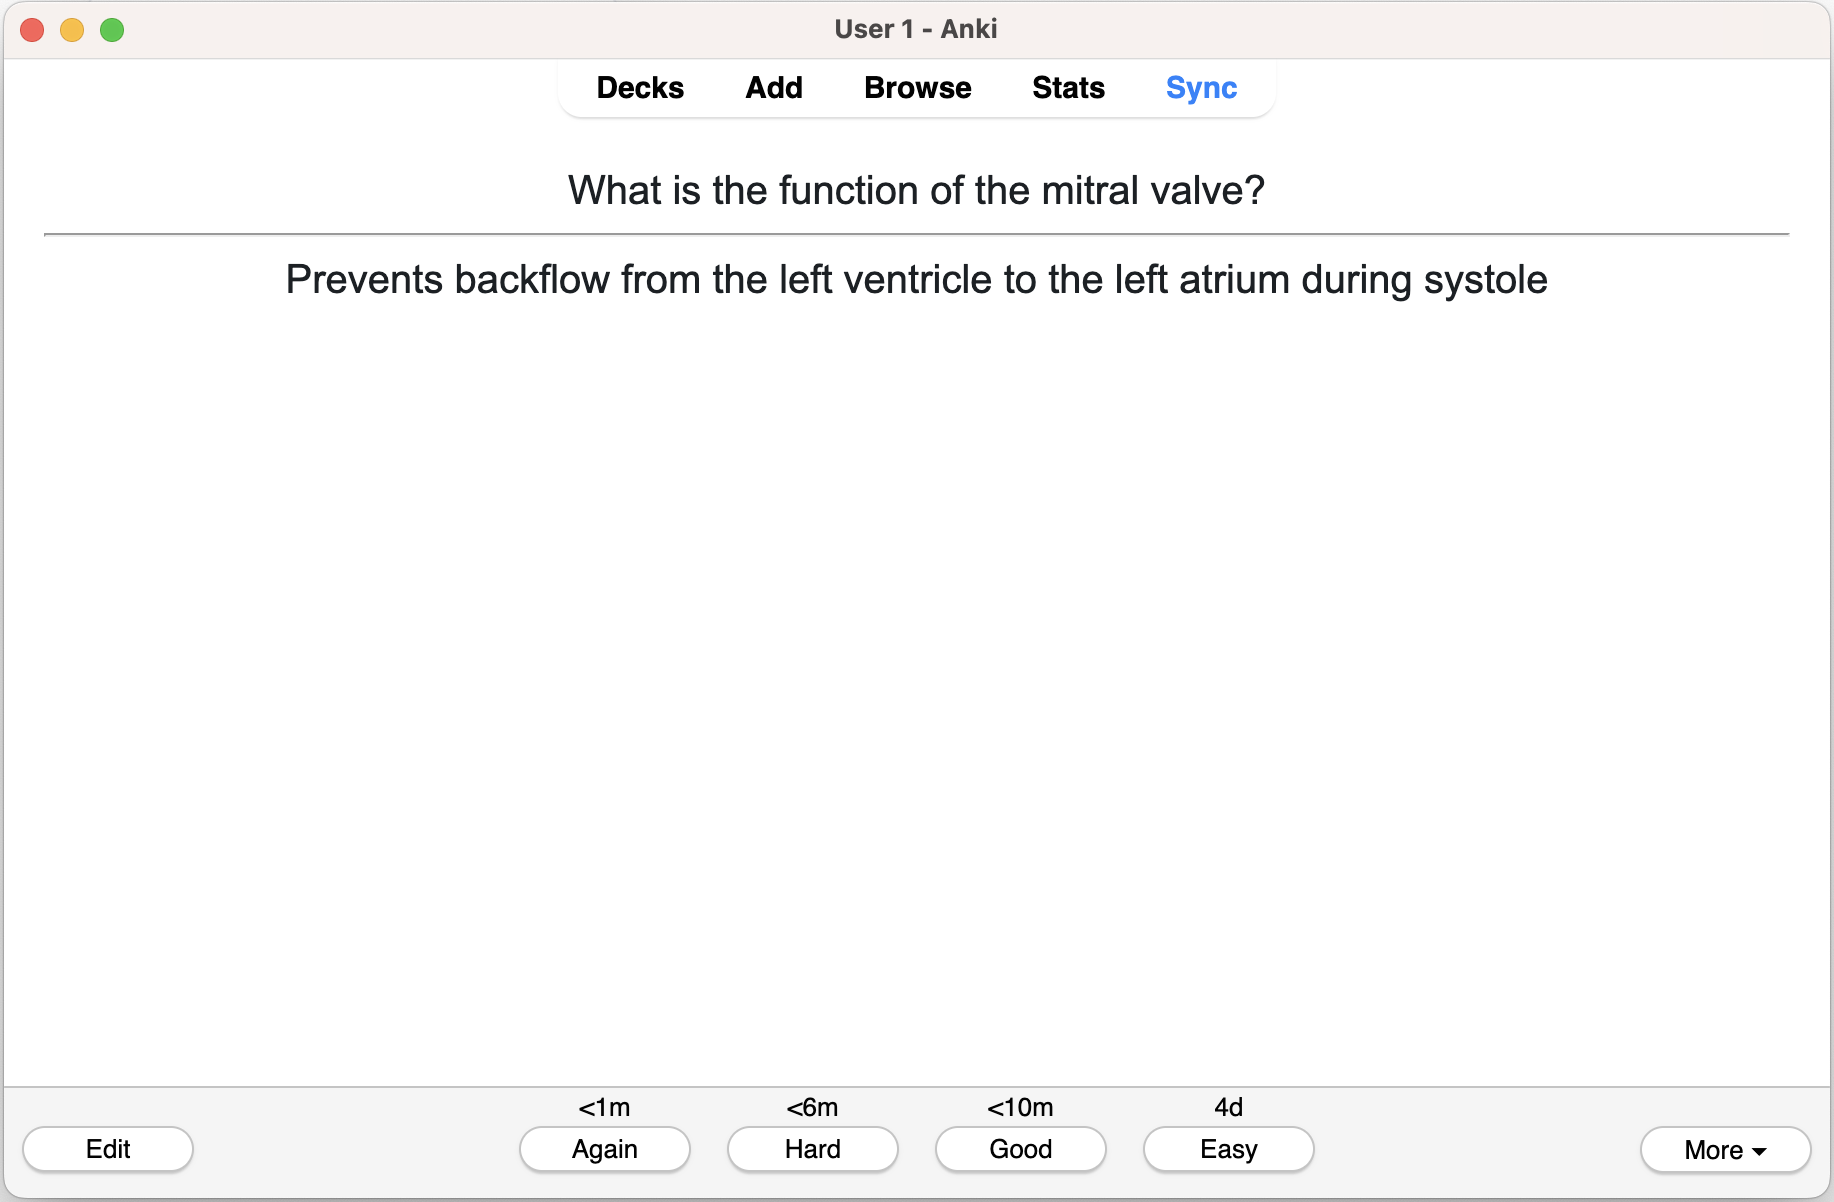
Basic (Front / Back) Cards
Best for definitions, facts, and formulas.
Example:
- Front: What is the function of the mitral valve?
- Back: Prevents backflow from the left ventricle to the left atrium during systole
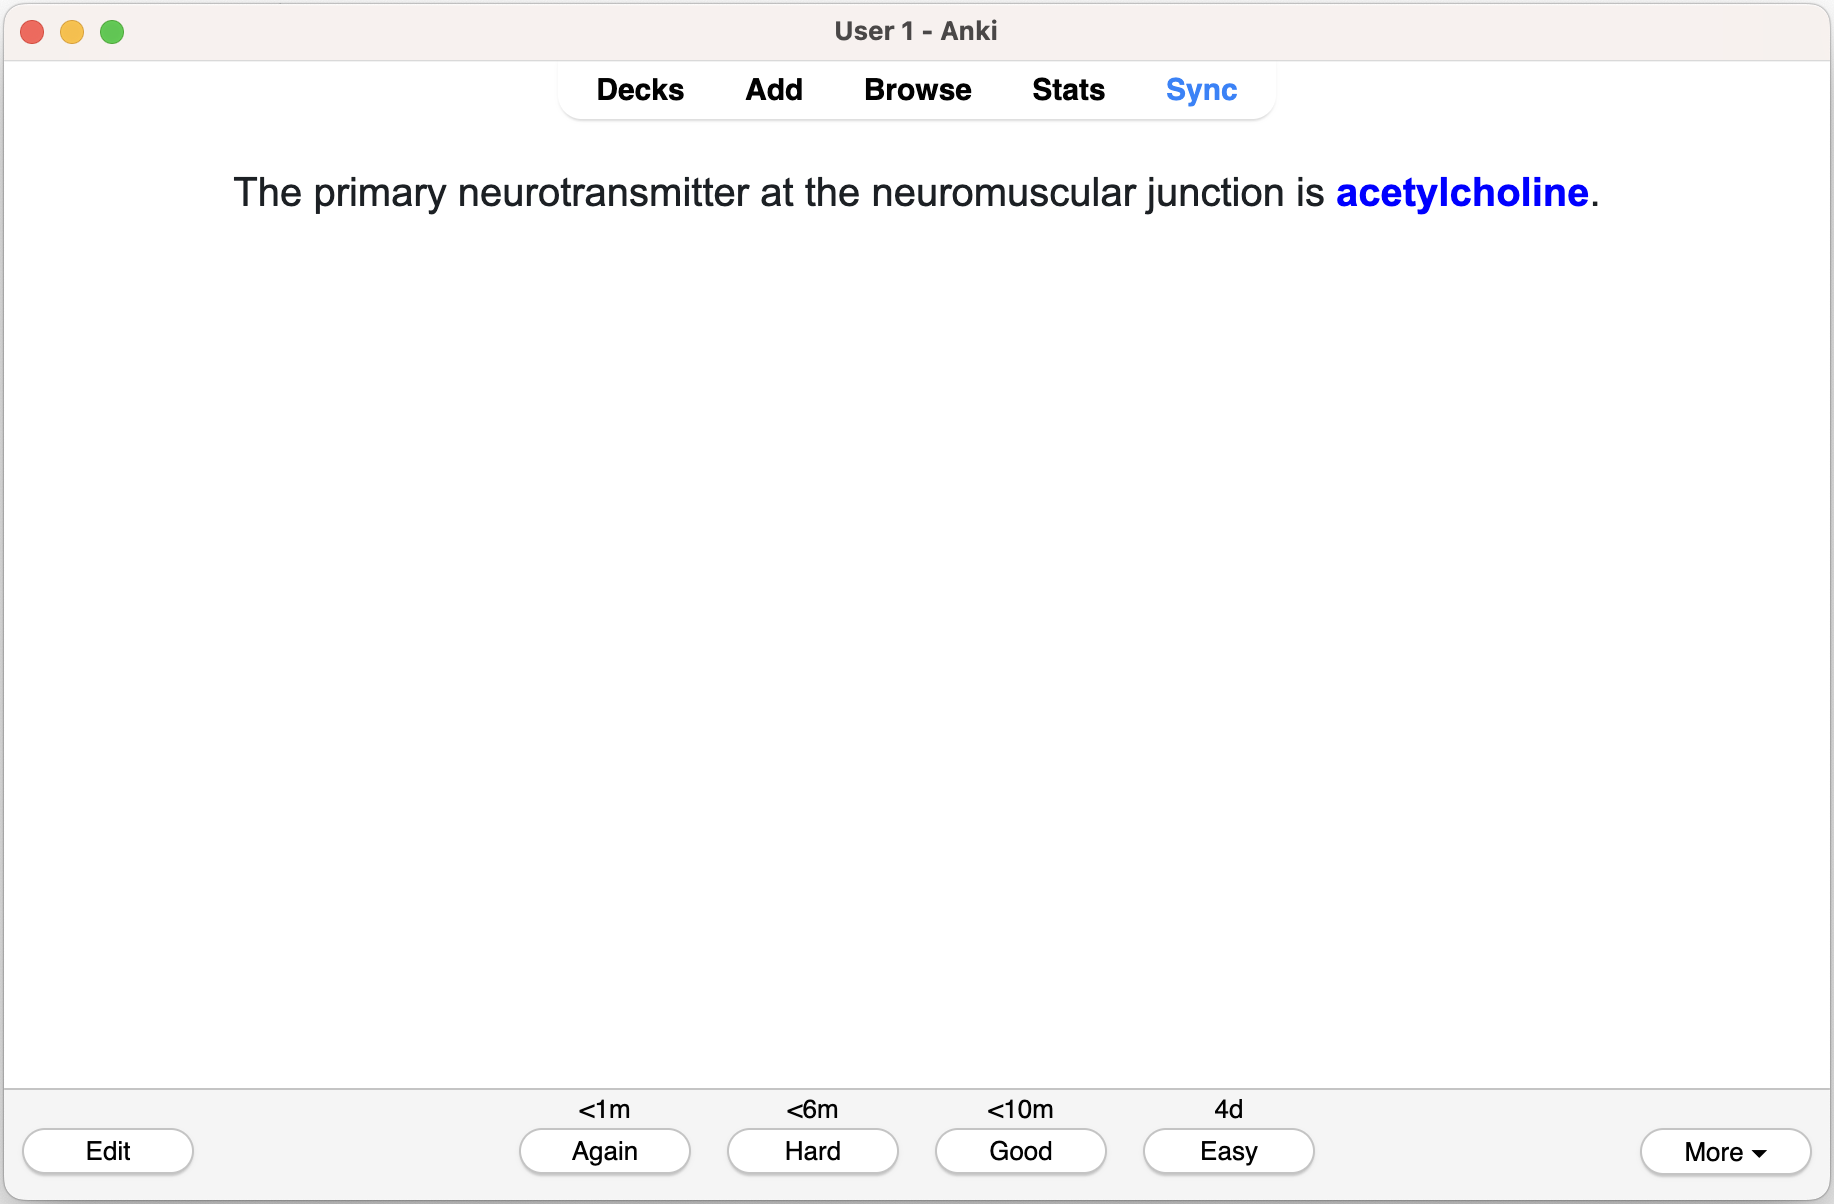
Cloze Deletion Cards
Best for processes, pathways, and context-dependent facts.
Example:
“The primary neurotransmitter at the neuromuscular junction is {{c1::acetylcholine}}.”
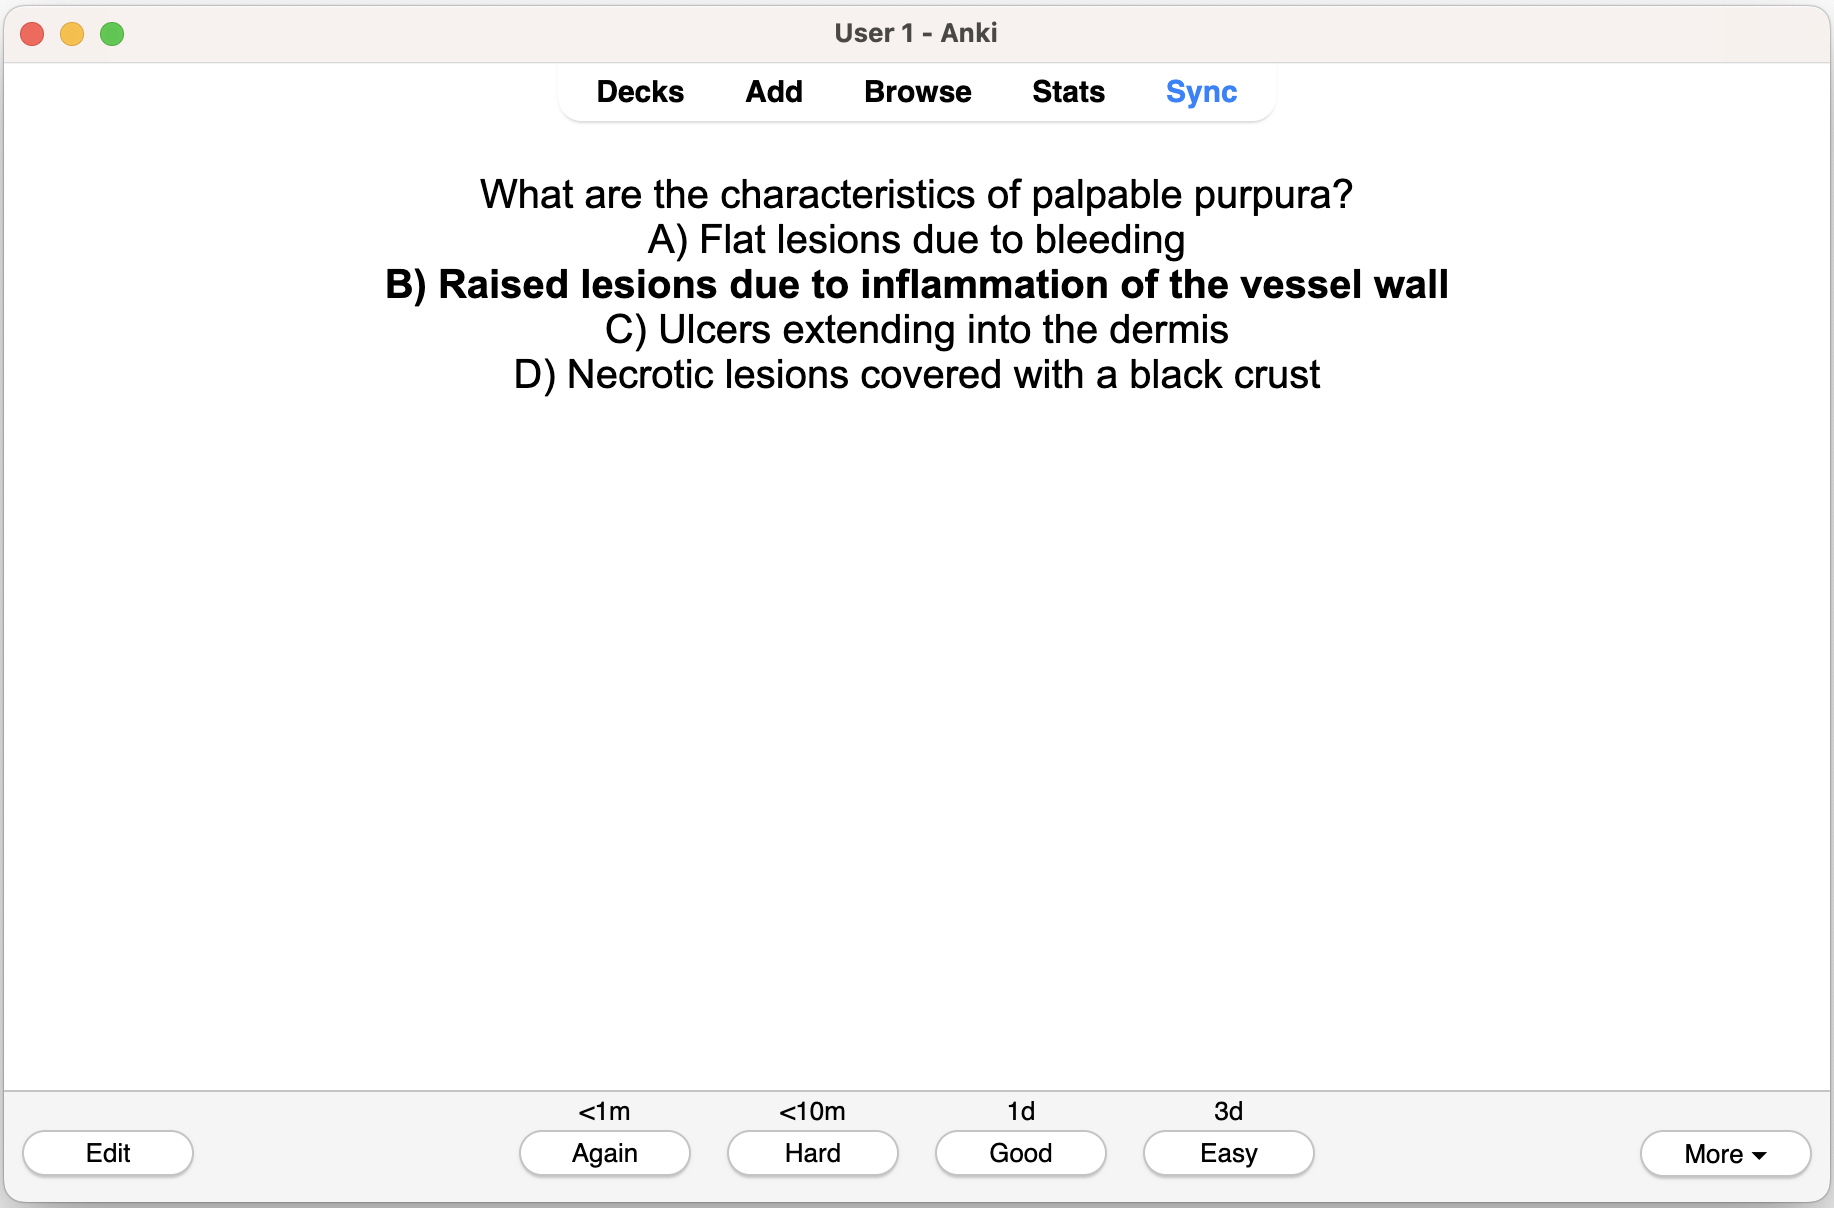
Multiple Choice Cards
Best for exam-style practice and distinguishing similar concepts. Use sparingly, as Anki works best with recall-based cards.
Step 3: Set the Right Number of Cards
More cards do not automatically mean better learning. The goal is clarity and coverage — not volume.
A general guideline:
- Summary notes: 15–30 cards
- Lecture slides: 30–60 cards
- Textbook chapters: 50–200 cards
Starting with fewer cards is often better. You can always regenerate the deck with a higher card count after reviewing the results.

Step 4: Customize Ankify for Better Results
Most users skip customization, but this step makes the biggest difference in flashcard quality.
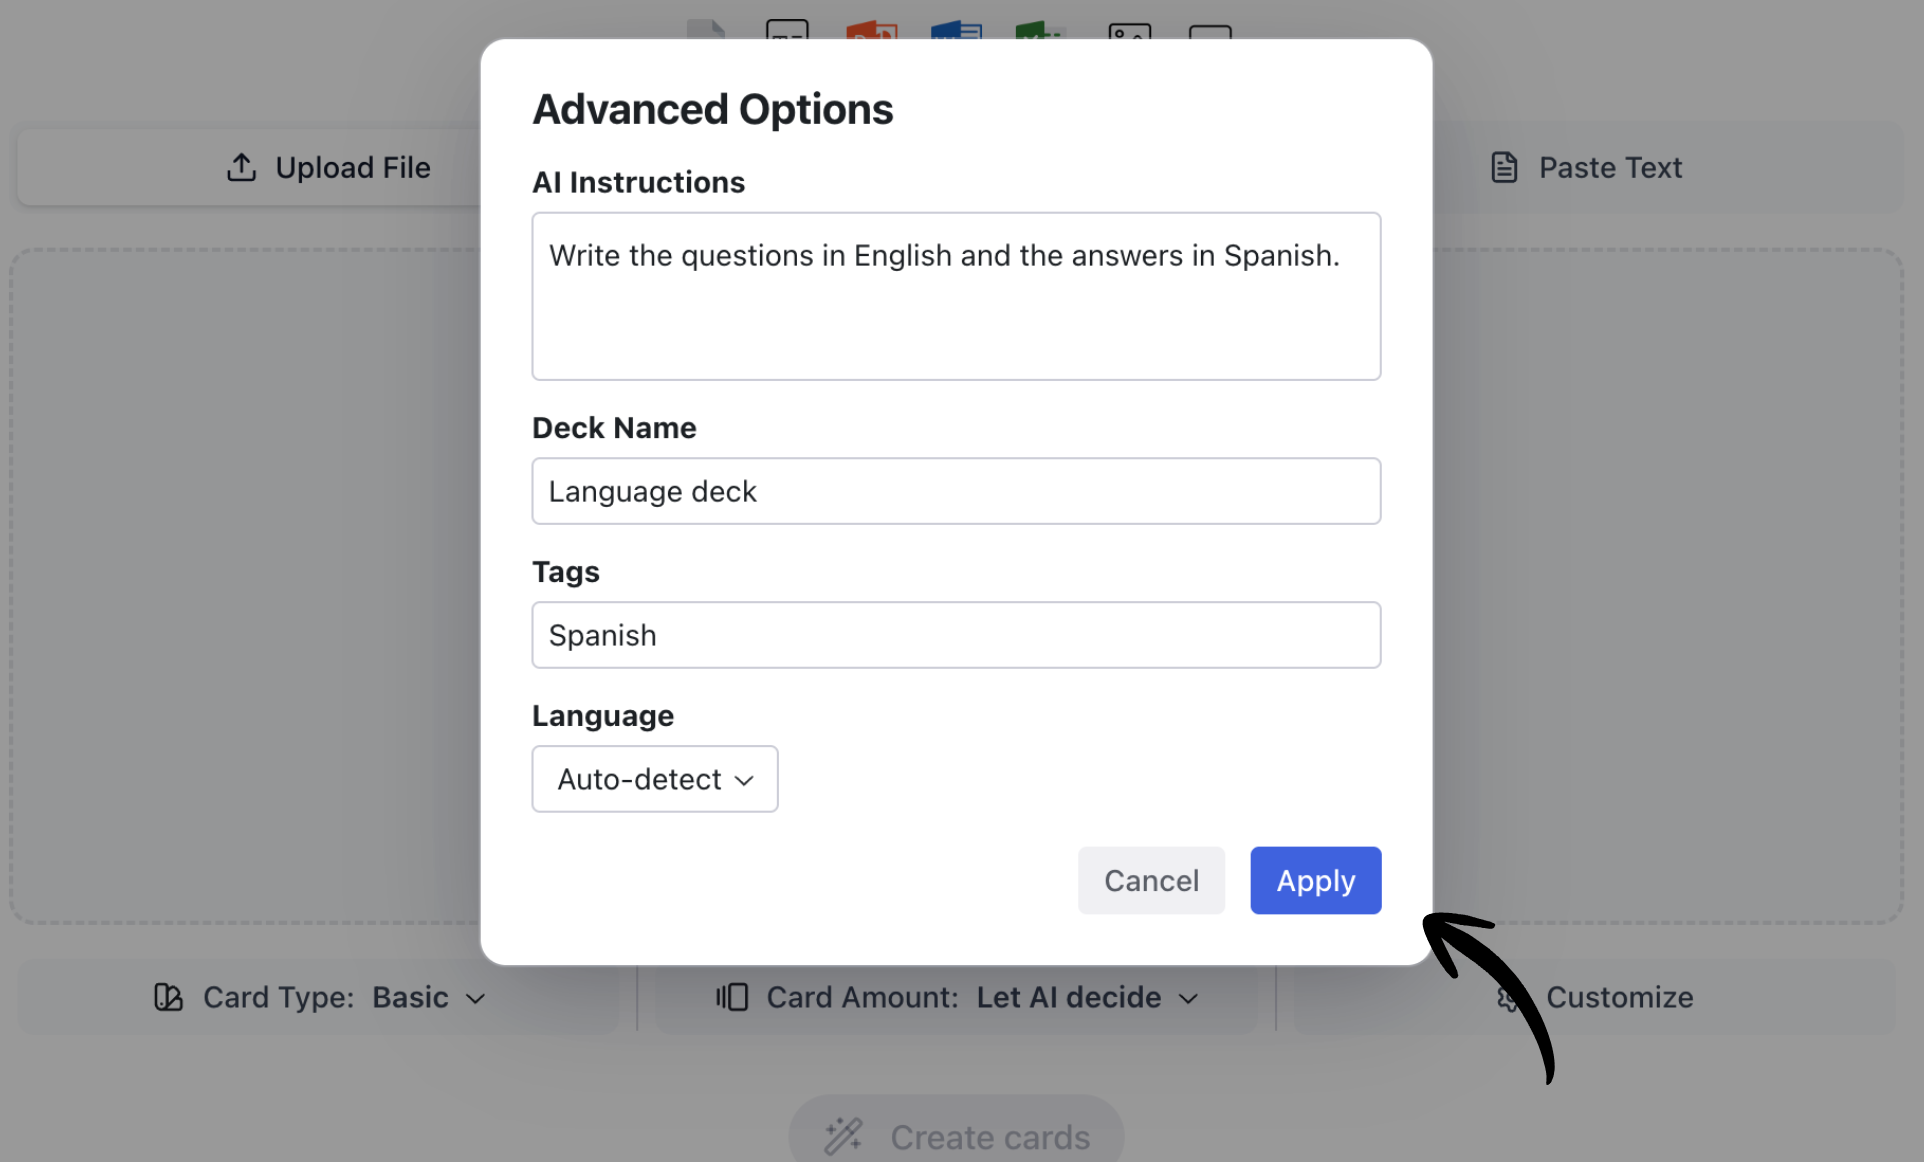
Add AI Instructions
AI Instructions tell Ankify how to generate your cards. This should be the first setting you configure.
Examples you can copy and paste:
For exam-focused studying:
“Focus on high-yield, testable facts. Keep questions precise and answers concise.”
For deeper understanding:
“Include brief explanations in answers. Add examples where helpful.”
For definition-only decks:
“Create clear front/back definition flashcards. Avoid vague or open-ended questions.”
Good instructions reduce vague cards, prevent duplicates, and ensure each flashcard tests one clear idea.
Name Your Deck Clearly
Choose deck names you’ll recognize later, such as:
- Cardiology — Valvular Disease
- Biochemistry — Glycolysis Pathway
- Spanish — Subjunctive Mood
Clear naming keeps your Anki library organized over time.
Add Tags Strategically
Useful tags include lecture numbers, exam preparation, or topic labels. Tags make it easier to filter cards and create focused review sessions in Anki.
Step 5: Generate and Review Your Flashcards
After clicking Generate Cards, Ankify will extract key concepts and create a preview deck.
Before exporting, spend a few minutes reviewing:
- Remove duplicate cards
- Split cards that test multiple facts
- Rewrite vague questions
If you can’t answer the front of a card in one clear sentence, it usually needs revision.
Step 6: Export and Import Into Anki
When you’re satisfied with the deck:
- Download the .apkg file from Ankify
- Open Anki Desktop
- Go to File → Import
- Select your downloaded deck
Deck names and tags transfer automatically.
Best Practices for High-Quality Anki Decks
High-quality decks are built gradually. Focus on one topic per deck, use Cloze cards for processes, and prioritize clarity over quantity. Consistent tagging and refining AI instructions over time lead to better long-term retention.
Who Benefits Most From Ankify?
Ankify works especially well for students in medicine, dentistry, law, engineering, and other content-heavy fields. It’s also useful for exam preparation, language learning from PDFs, and turning lecture slides or research papers into structured flashcards.
Final Thoughts
Turning files into Anki flashcards shouldn’t take hours.
With Ankify, you upload your material, choose smart settings, review briefly, and export a clean Anki deck — so you can focus on learning instead of formatting.
👉 Try it now at https://ankify.app and generate your first Anki deck in minutes.